Rush World was our submission for an educational brief about making an on-rails arcade game. Inspired by titles such as Nippon Marathon, Super Mario Party, and Minna de BishiBashi, we set out to create a fun obstacle/puzzle party game with an on-rails camera, and absolutely smashed it. Additionally, the game was showcased during the end-of-term event night on campus, receiving an awesome response - the arcade cabinet had to be moved to a larger room because of the crowd!
​​​​I created a Japanese-themed level for the game using the POLYGON Samurai Pack. This level was inspired by Takeshi's Castle - check it out below!
Additionally, I developed the UI for the game - more details here.​​​​​​​
This level was at the time the biggest I'd created yet, and was a lot of fun to make. It's certainly not perfect in hindsight, being a bit too big and thus a little longer and more difficult than intended. However, it's one I am genuinely proud of (as an early gem) because of how I followed through with my creative process, and successfully realised a design that I worried might have been too complex. 
I also love the aesthetic; the POLYGON Samurai Pack was a dream to play around with and contained more than enough assets to fill the scene. Using the modular building meshes, I was able to create the castle, a temple, and a few different variants of the village houses. Each of the traps/obstacles along the path up to the castle was also built by simply combining different meshes together into something new. 
For a quick look, I've included a rough TLDR list of my process to the right. Keep scrolling to see more details.


Process TLDR:

Ideation/research
Gather reference material
Layout sketch/diagram
Blockout and test assets
Layout and test player path
Set up various triggers
Build modular structures
Build trap/obstacle objects
Place traps/obstacles and test
Replace blockout meshes
Add decoration​​​​​​​
This diagram was the first reference point for the level, showing the full layout with the player path, as well as trap, obstacle, and puzzle (gate/button) locations. Having this diagram handy made the blockout process really simple, and saved me a lot of time and confusion later on when placing the large number of assets in the scene. 
I learned a lot about process during this project, starting here. In future projects I have continued to start levels with diagrams like this and found them a great help, both as a personal reference and as a way to communicate my concepts and designs clearly! Another method which aligns well with these diagrams is moodboarding, and you can see some reference material I gathered from other sources below.
Castle & Temple References
Village & Castle Grounds References
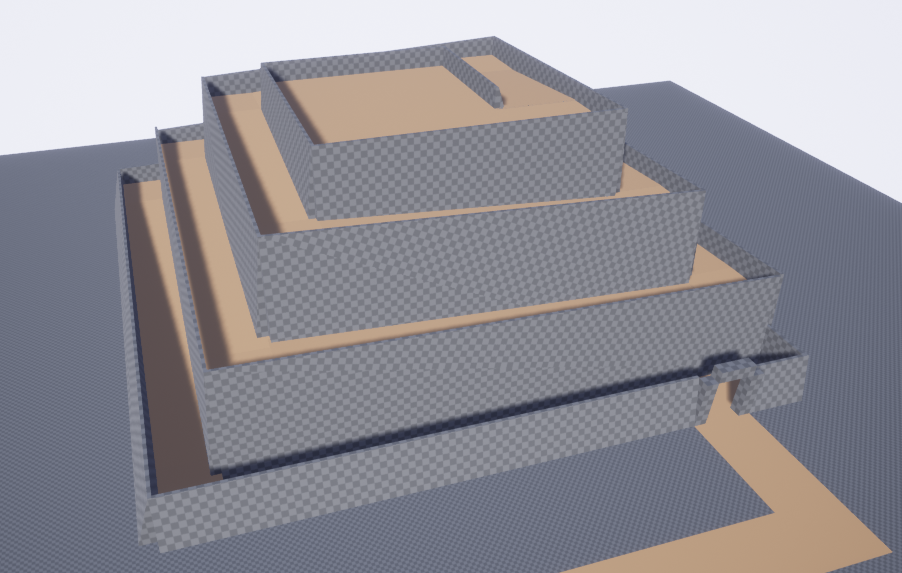
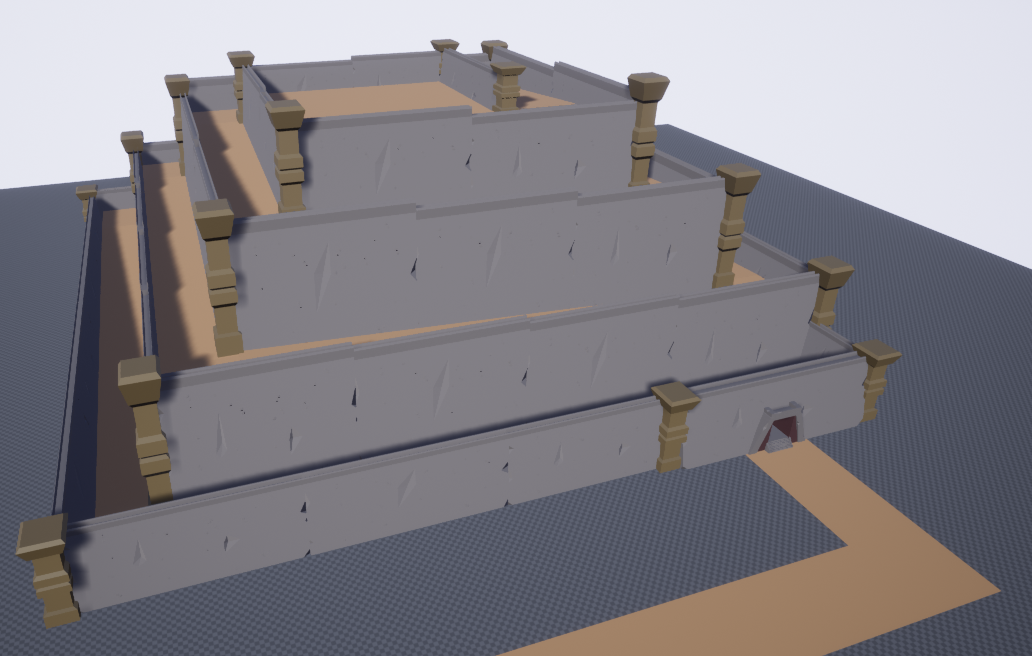
When doing the blockout, I started with the largest part of the level first - the castle grounds, and player path. The castle grounds is made up of a square spiral of ramps, with a flat space at each corner to connect them.
I've also included an image of the walls replaced with some of the POLYGON assets. I wasn't exactly sure how all the assets would fit together as it was a third-party pack, so I wanted to try some things out early on just to get a feel for using them and be sure they fit.
From here I continued to blockout and insert placeholders before doing some testing, then moved on to creating the custom buildings and traps/obstacles, replacing the blockout and decorating the level.
After building the custom structures, finalising the design, and replacing the blockout (plus some sneaky decoration), here's what I had after a first pass.
Here are the trap/obstacle objects I made for the castle path. These were either groups of objects or several meshes combined into one, and each had scripts (blueprints) attached for movement and player interaction.

Spiky Barricades
(Spears, Kunai & Pole)

Death Dummies
(Katana & Dummies)

Spear Windows
(...Spears & Windows)

Boulders
(Torii Gates, Bamboo, Fences & Icospheres)

To further improve the player experience, I made use of decorations to help direct players and make the environment more interesting and realistic.
Testing and feedback revealed the town area was the least clear path, so my efforts were focused there first.

The path through the town wasn't completely clear.
I used colours and object placement to
direct players around the corner corectly.

The torii gate is big and attention-grabbing because of the colour,
but additional objects help to partially block
the possible alternate path.

Elsewhere, I used my best judgment, placing objects in positions which felt natural and looked good.

Each corner of the castle path contains a respawn point for players.
The fire serves as the respawn, and the other objects surrounding it
make the space look more interesting and feel more real.

Not all boulders were able to run to the rear wall,
as only the ground-level path had room for a gate there.
Instead, fences and more decoration were used to help imply that
the boulders were redirected into these side-wall gates instead.

Finally, the path and layout following my final pass, with all decoration, traps, obstacles, and triggers implemented.
Scroll back to the top for the full view of the level!
Back to Top